.png)
.png)


Using YNAB as a Student Loan Planner


Interested in setting up a student loan planner but don’t have YNAB? Try it out for free for 34 days (no credit card required) to see how a budget can help you turn the chaos of student loans into an organized and tidy plan. Sign up, check out the Ultimate Getting Started Guide, and meet us back here.
Whether you’re just starting your student loan journey or already deep in the forest of student loan debt, let’s take a moment to acknowledge that the entire process is complicated and can be overwhelming.
Yeah, yeah, yeah—there are advisors and aid offices and disclosures and documents but the language is confusing, the information is spread out across different loan servicers or websites, and there’s just a lot of stuff to keep straight!
If you’re not exactly sure what’s going on with your loans or how best to tackle that debt, take solace in the fact that you’re not the only one with student loan anxiety—but there’s also no need to stay stuck in loan limbo. Let’s stop, take a deep breath and organize your loans (and your life) by learning how to use YNAB as a student loan planner.
It’s going to feel so good!
Step One: Find Your Student Loan Information
Alright, ready for a little scavenger hunt? Because we need to find some stuff before we can accomplish Mission Let’s Make a Student Loan Plan. And we might need to workshop our mission name a little bit, I don’t know, it seems clunky.
The first part is easy: Go find some paper and the writing utensil of your choice.
The second part is also easy, but may be a little easier for the already-organized or brand new borrowers among us (but have no fear, we’re all going to be in the organized group soon!)
We need to find and write down the following information:
- Name of the Lender
- Current Balance (if interest has accrued, the Current Balance is the principal plus accrued interest)
- Interest Rate
- Minimum Monthly Payment (the amount you are required to pay toward this loan each month)
- Monthly Payment Due Date
Not sure how to find your student loan details?
- If you have federal student loans, use your FSA ID (or create one) to log into the National Student Loan Data System (NSLDS).
- If you have private loans, contact your original lender. If you don’t know who that is, request your free credit report at annualcreditreport.com for clues.
- If you’re still unsure, contact your school’s financial aid office and ask for help!
If you’re really lucky, you’re reading this before you’ve even accepted loans, which is a heck of a head start to have.
Step Two: Create a Category Group in YNAB
Now, head on over to your budget and create a Student Loan category group. Name it something fun or add an emoji for extra inspiration—or just as an excuse to laugh at your own inside jokes whenever you open your budget.

Step Three: Add Your Student Loan Accounts
Student loans debt is rarely just one single loan balance, which is part of what makes the situation so confusing. Slaying one dragon makes it easy to stay focused and organized; fighting off several different-sized reptiles with various levels of ferocity can introduce some low level chaos.
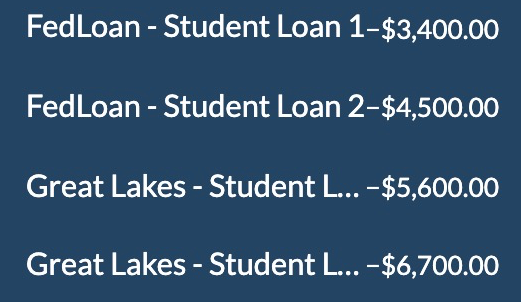
That’s why we believe you should enter each individual student loan account in YNAB, instead of lumping them together into one combined balance of your debt. It’s not to make the process more complicated—we’re helping you corral these beasts so that you can keep an eye on them as you design your plan of attack. Here’s how:
- Click Add Account, then choose Unlinked.
- Select the Student Loan account type, and work through the rest of the prompts to add the Student Loan account to YNAB.
- When YNAB asks which category you’ll use for payments, choose create a new category and add that category to the Student Loans category group that you made earlier.
- Repeat the process for each loan.

Adding your loans separately allows you to track the interest rates, monthly payments, and your overall progress, which will all come in handy later.
Feeling a little anxious about seeing the list every time you open your budget? Understandable. Just collapse that Loan accounts section and/or category group when you’re not using it.
No one needs a budget full of dragons in their face all of the time.
Step Four: Make a Strategic Student Loan Repayment Plan
But here’s where the magic happens: allow us to introduce the Loan Planner.
At some point, you’re going to be extra motivated to delete these loans—and this debt—from your budget and your life, once and for all, because there’s really no feeling like financial freedom.
How do you prioritize what to pay first?
You could do some mental math, shove the loans with lower interest rates further down the list, and half-heartedly throw some extra cash towards the others whenever you find or make money that isn’t already earmarked to pay other bills.
Or you could put YNAB’s Loan Planner to work and actually see how much each loan costs, how you can save money by paying extra, and how much time those extra payments shave off of the life of the loan.

Suddenly, you know which loans cost the most and how much of a difference those extra payments may make. And then the best repayment option for your personal student loan paydown plan becomes crystal clear.
It’s a lot easier to reach the finish line once you know where it is.
Step Five: Follow Your Student Loan Plan
Now that you’ve got your incredibly organized plan for loans, it’s time for the most important (and unfortunate) part: making those loan payments.
Stay organized by setting a Monthly Debt Payment target for each loan—it will help you remember how much you need and by when.

Most lenders accept one payment amount that they split up and apply to the different loans you have with them. If this is the case in your situation, we recommend recording payments as a split transaction in the account that is making the payment.

It might be especially helpful to set the payment to repeat as a scheduled transaction so that you don’t have to re-create this process every month.
One thing to note: YNAB won’t actually physically move the location of the money for you—bills will still be paid through your actual bank account, but YNAB will help keep track of the moving pieces so you can adjust and tweak your plan with information at your fingertips.
Deciding to tackle your student loans takes courage. It’s a lot easier to just avoid thinking about a jumble of numbers that has been confusing from the get-go, but facing your student loan debt head-on and creating a plan to eliminate it is a battle worth fighting.
Gain total control of your money—and your life— by organizing your loan information and using your budget as a student loan planner to create a strategy for graduating from debt.
Awareness is the first step of the journey and your budget is the map that can help make it all happen.
Ready to find some extra money to throw toward those student loan payments? Sign up for our free 30-day More Money Challenge and refresh your finances!


.png)
.png)
